
Introduction
Recently one of the requirements was to put validation to a custom list controls such as Email field validation.This validation can be achieved from inside the sharepoint designer.
Following is a step by step walk through to validate a list field
Background
You should know how to create a Sharepoint list and how to open the site in Sharepoint designer.-
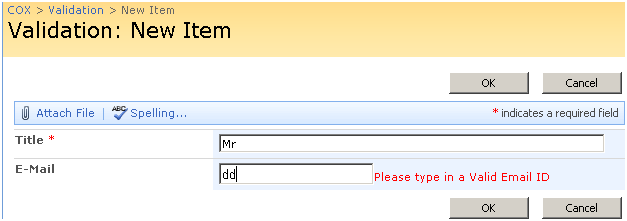
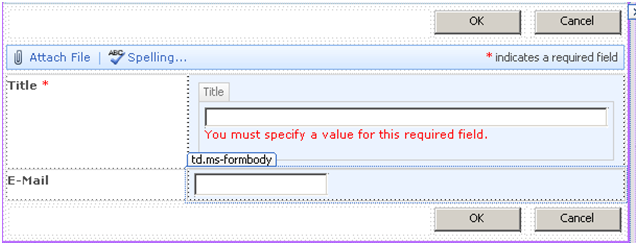
Following is a list with Email fields. Let's say we have to validate so that only a valid email can be entered.If not valid then the Error Message appears next to the field
-
Now open the site in the sharepoint designer and then expand the list and open the Newform.aspx of the list to be validated
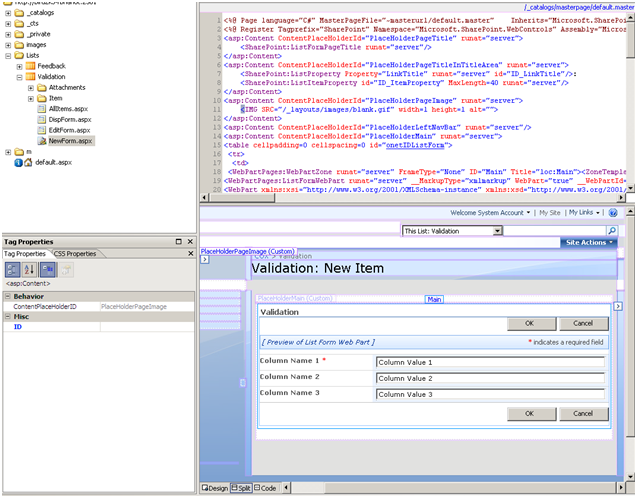
- As you can see in the image above the Newform.aspx of Validation list is being opened in the sharepoint Designer.
-
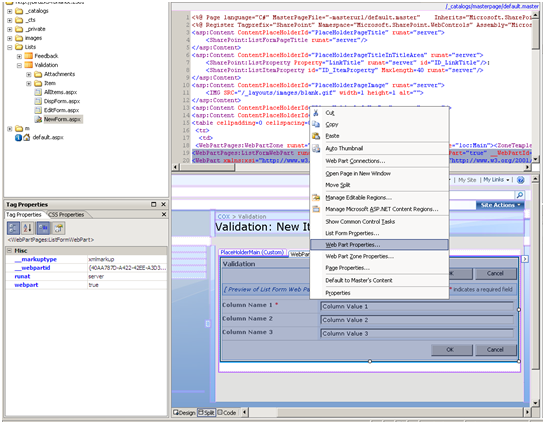
Now right click on this Validation list web part in sharepoint Designer and choose Web Part properties
-
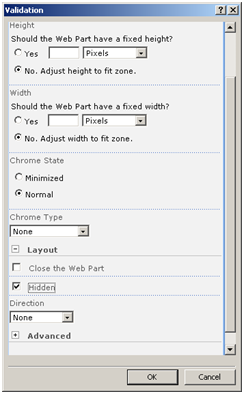
The properties dialog box will open for the Validation list here. Choose Hidden under layout and say ok.(This web part can be deleted as well, but due to some Known problems because of deletion it is best to hide this).
-
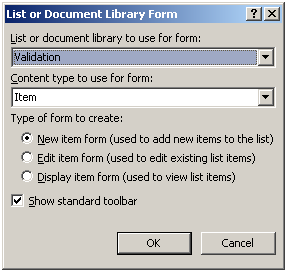
Now click exactly underneath the hidden list web part and go to Insert->Sharepoint Controls-> Custom List Form… and Wizard will ask to choose a List or Document Library form on basedOf existing list. Choose your Validation list and select New item form under type of from to create option and hit Ok.
-
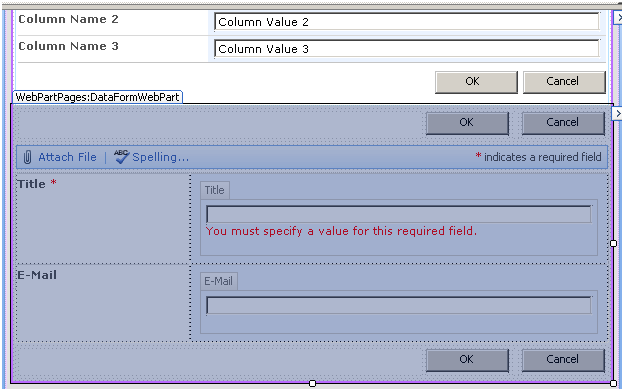
You will get the Validation List underneath the hidden list as shown as selected image below.
-
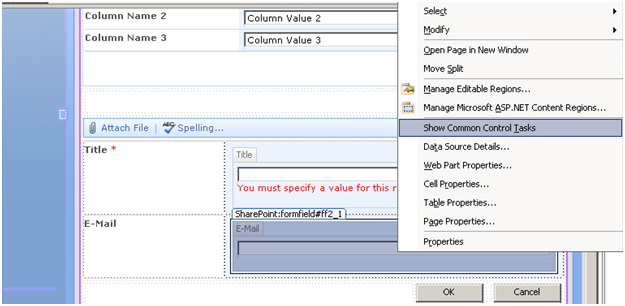
Now from here we can customize all the controls based on requirement. As we are customizing the E-MailField, right click on the email field box and choose Show common control tasks from the context menu.
-
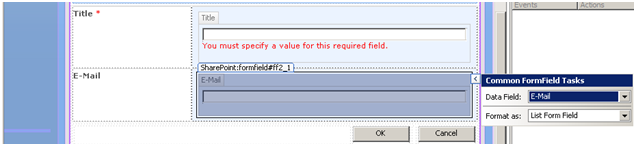
This will give you Common Formfield tasks option as shown below next to Email field. Here we can changeThe format of the data field selected (default is List form field). As we need Email field to be textbox where validation can be applied
Choose Textbox from Format as dropdown instead of List form field.
-
After the above step, List will look like this (custom formatted)
-
Now drop a RegularExpressionValidator control from the Validation option under ASP.Net controls from the toolbarAs shown below
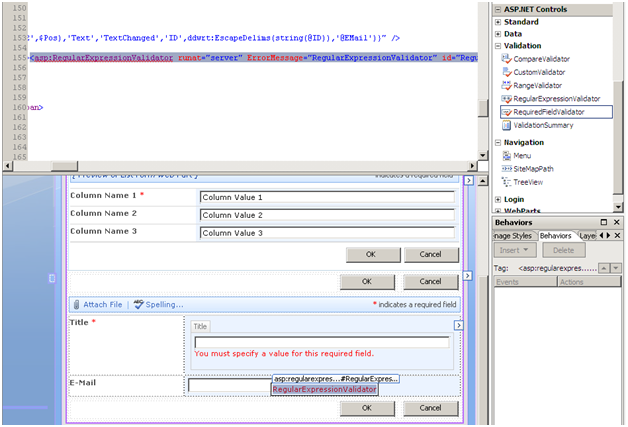
-
Now specify the required properties (such as ControlToValidate, ErrorMessage, SetFocusOnError to true, Validate Expression) of theRegularExpressionValidator from the Tag Properties toolbar. For ControlToValidate choose the ID of the Email field
After selecting it and getting the ID from the Tag Properties toolbar as you do in Visual Studio. See below the set attributes in blue
For the Email Field
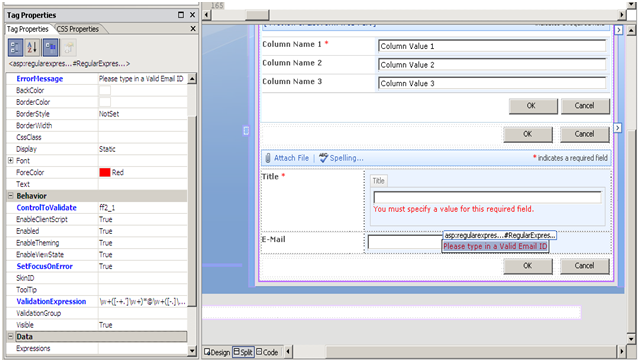
-
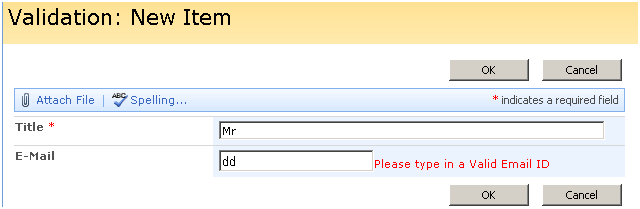
Now Save the changes and go back to the list in IE and try to type in invalid email id and you will get following
Print this post

No comments:
Post a Comment